Harry Potter wand making
There are lots of tutorials on the web for how to make simple wands quickly and easily. This is not one of those posts. I wanted to go all out in making wands for Molly’s party, and I got very into it. If you’re into woodworking and looking to go all out on something like this, hopefully you’ll find this post helpful. And if you’re not interested in woodworking, and you read this anyway, hopefully you are entertained by someone going all out on something they love.
In this project, I wanted to:
- Use different kinds of real wood, just like Ollivander
- Turn them round with varying unique designs
- Include cores in them, like those in the Harry Potter universe
- Stain them to make them look good and distinct
- Seal them with polyurethane to make them smooth, shiny, and durable
Turning
After Christmas, I used some money I was given to order myself a lathe and some cutting tools to use with it. The cutting tools showed up quickly. The lathe itself ended up backordered, and they said it wouldn’t arrive until the end of March. This, of course, did not work for my plan.
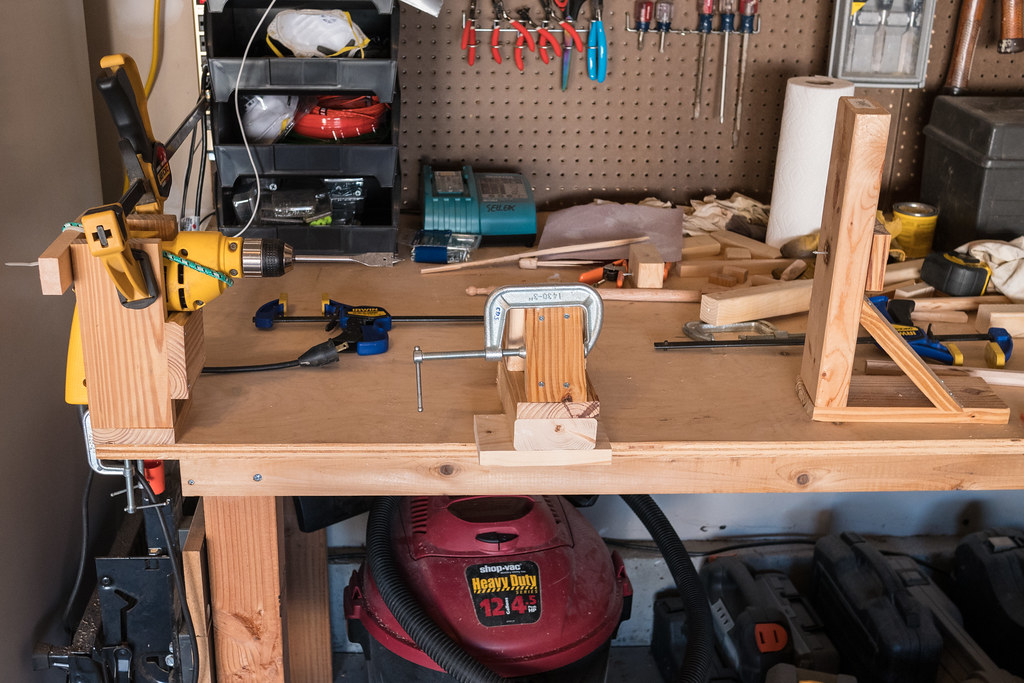
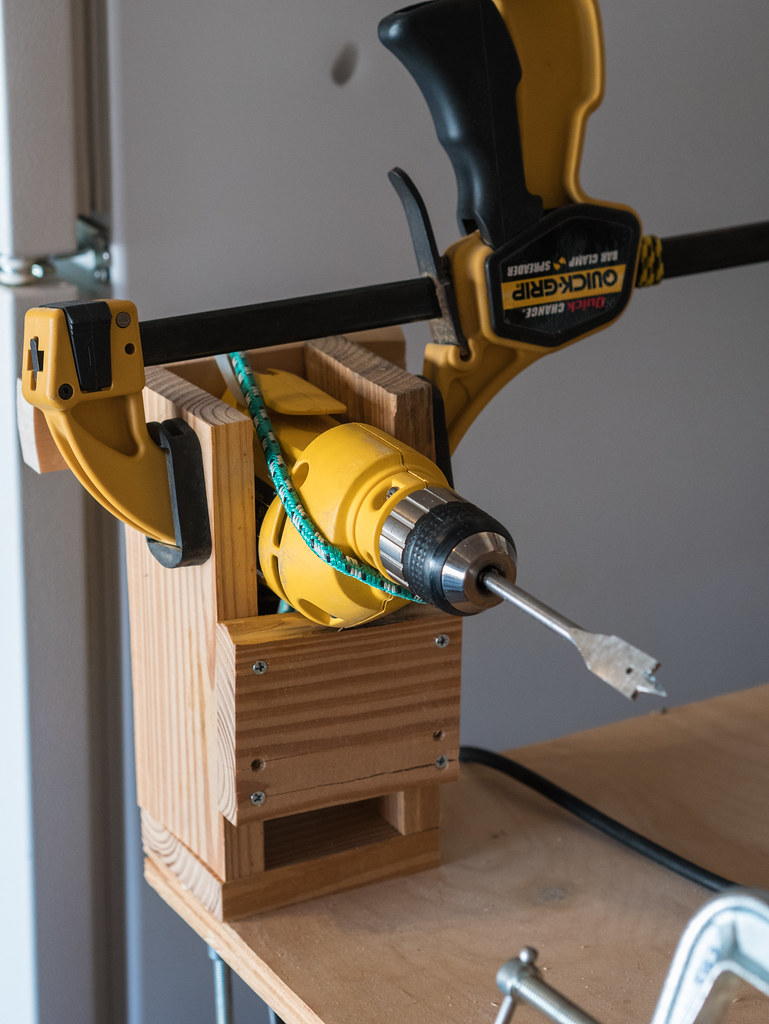
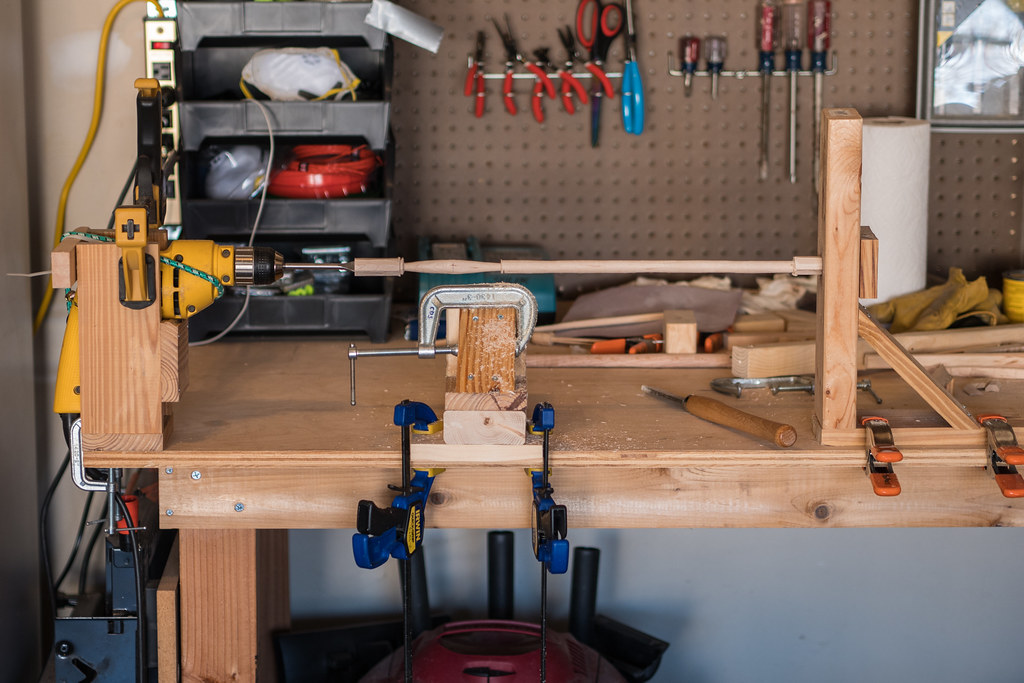
So, I built a makeshift DIY lathe. I built a box to hold my drill steady, then built a simple support with a nail sticking out to hold the other side. Then I built a tool rest and put a clamps on top to give a hard place to rest the lathe tools.
Here’s a close-up of the box to hold my drill. It’s got clamps and bungie cords trying to hold it as steady as possible. I used a flat half inch drill bit to turn the wood (which fit into a slot I cut with the band saw).
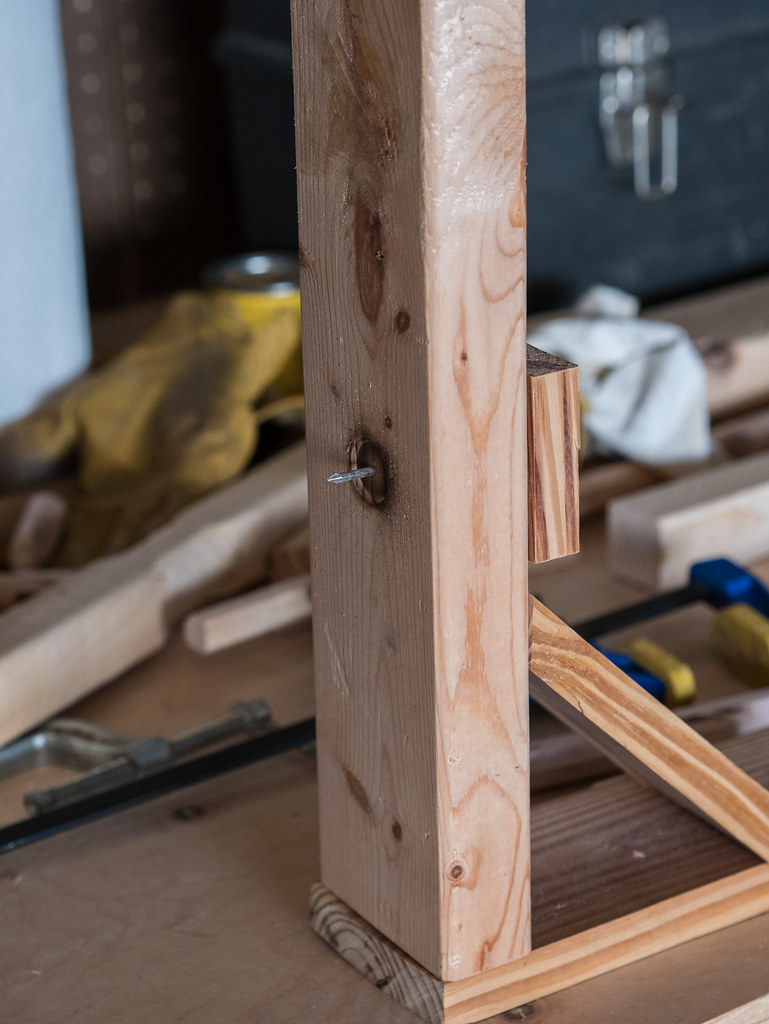
The side support was simple with a nail sticking out for the wood to turn on. The turning wood often scooted all the way next to the support wood, leading to burning. So watch out for that if you try this.
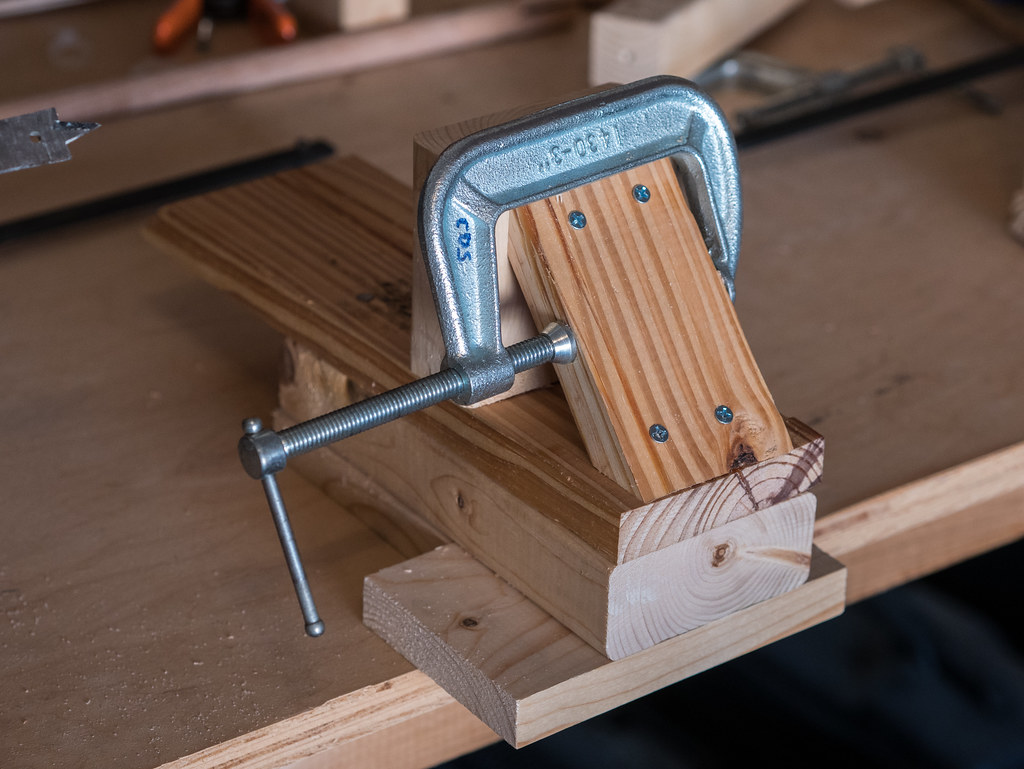
My tool rest was simply a bunch of wood screwed together with a metal clamp for supporting the cutting tools.
I made slots in the end to put a flat drill bit into to turn the wood in my drill. I found the band saw (which used to be my dad’s) was the best tool for that job.
Here’s the whole apparatus with a wand in progress.
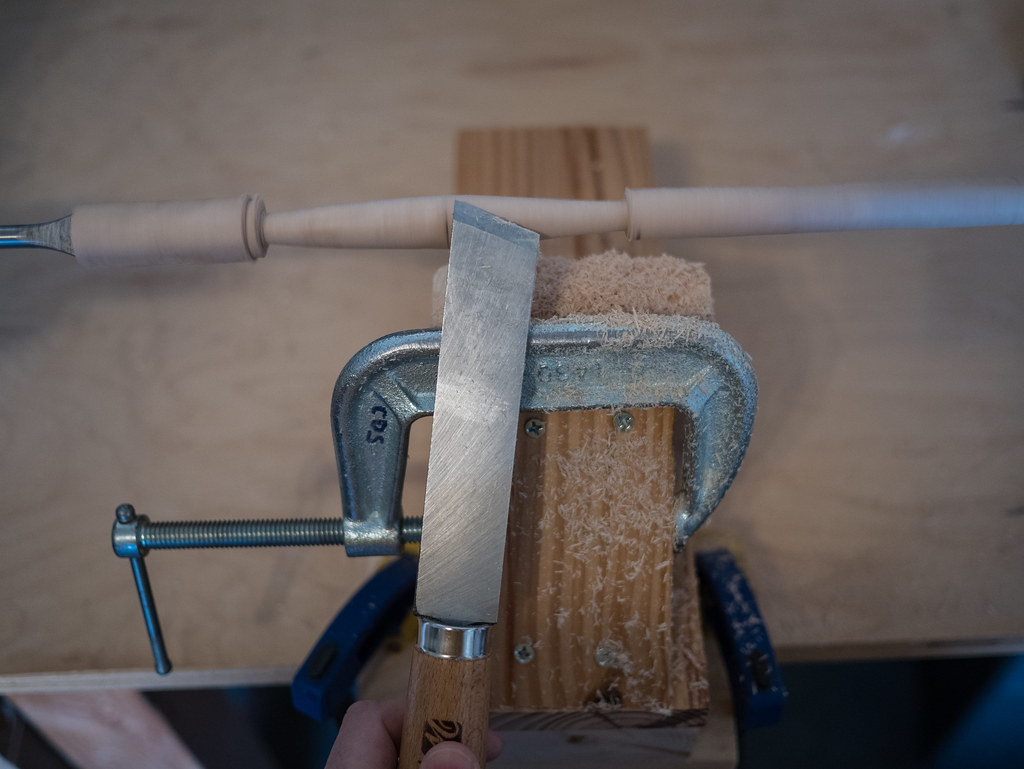
And here’s an up close look at the wand with my larger skew. I definitely used the larger skew more than any other cutting tool.
I turned around half of the wands I needed on that apparatus. It functioned, but was not the most stable thing which limited what techniques I could do and meant my results were less perfect than I would like. Then one day, without any shipping notice, my lathe showed up on my doorstep earlier than they expected. I quickly tore down my DIY lathe so I could try out the real one.
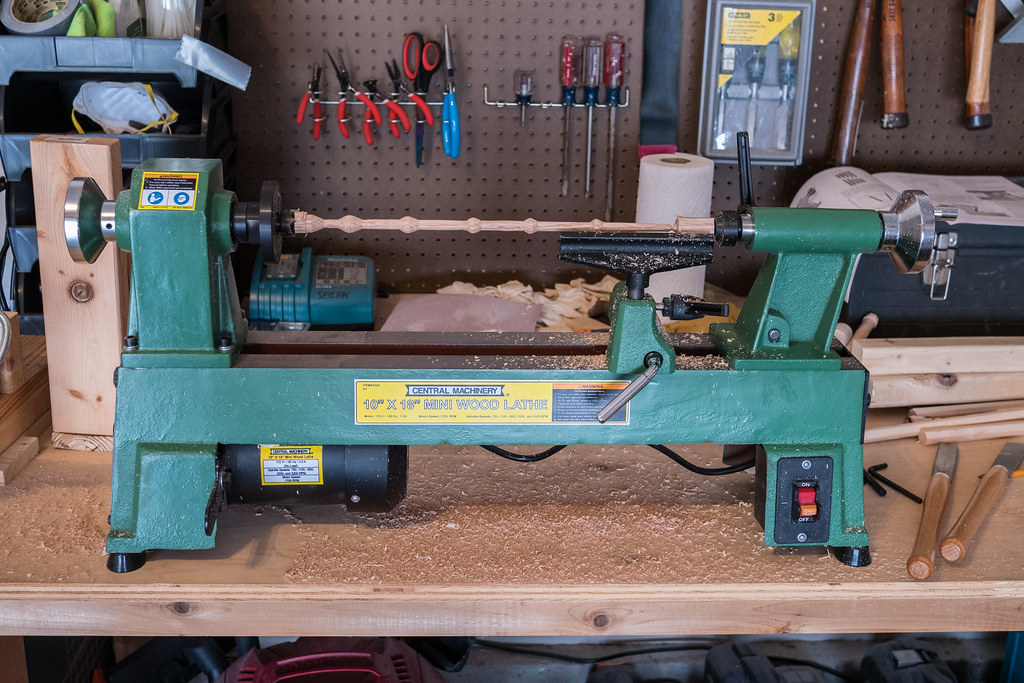
I must say, the real lathe was so much better than the DIY one. It was much more stable, much easier to move things around, and much easier to do exactly what I wanted to do. I was suddenly able to do lots of techniques that were not possible on my DIY lathe. I was also able to work faster, turning a wand in an hour or so instead of 2 to 3.
Wood
I got my wood from Home Depot (though a fancy woodworking shop would likely have had more selection). I bought 1x2 boards, which I brought home and ripped in half (to create 2 1x1s) on the table saw. I then used the table saw at a 45 degree angle to shave off the corners, making the blanks octagonal. I also wanted to make a few wands with wider features, so I bought a cheap pine 2x2 (and made it octagonal) for those.
The woods I used were:
- Maple
- Oak
- Poplar
- Cedar
- Pine
Staining and Sealing
After turning the wands and drilling their core hole (more on that later), I stood all the wands up on wire nails poked through cardboard strips to stain them. I used 4 different stains and polyurethane to create lots of different looks.
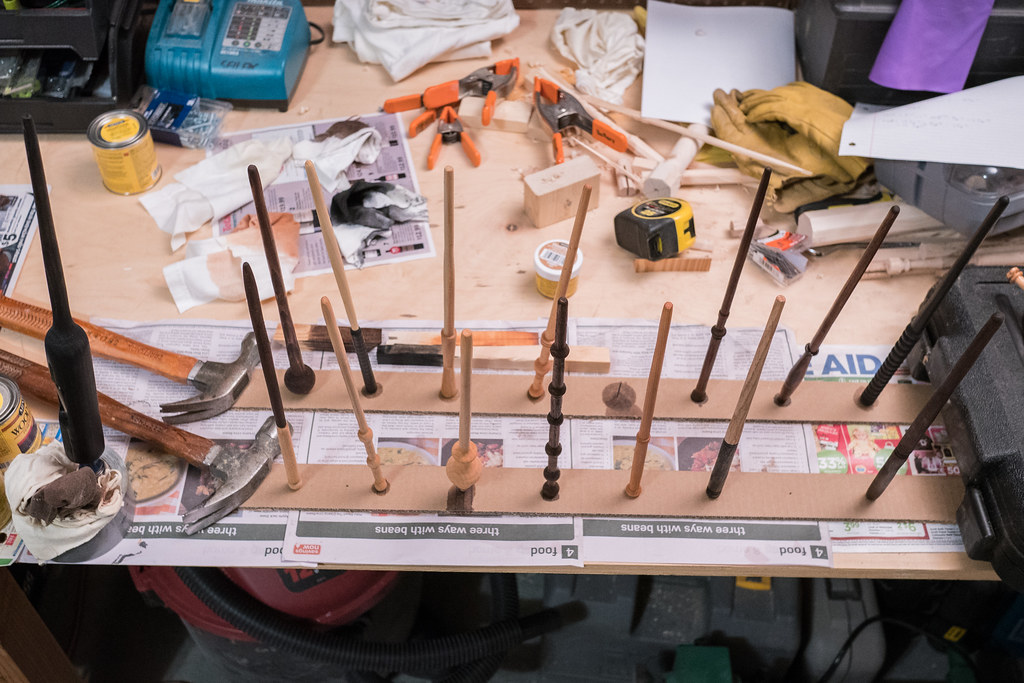
Staining and sealing took many days. Some wands got 2 coats of stain and 4 coats of poly. Of course, I sanded each wand between poly coats.
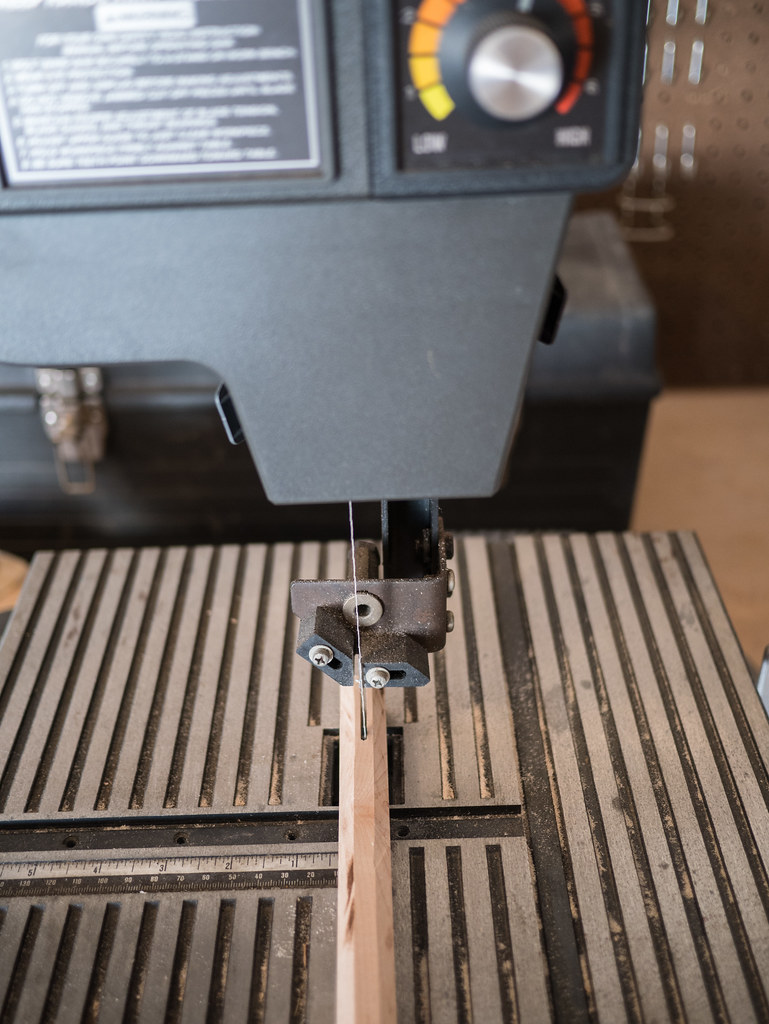
Cores
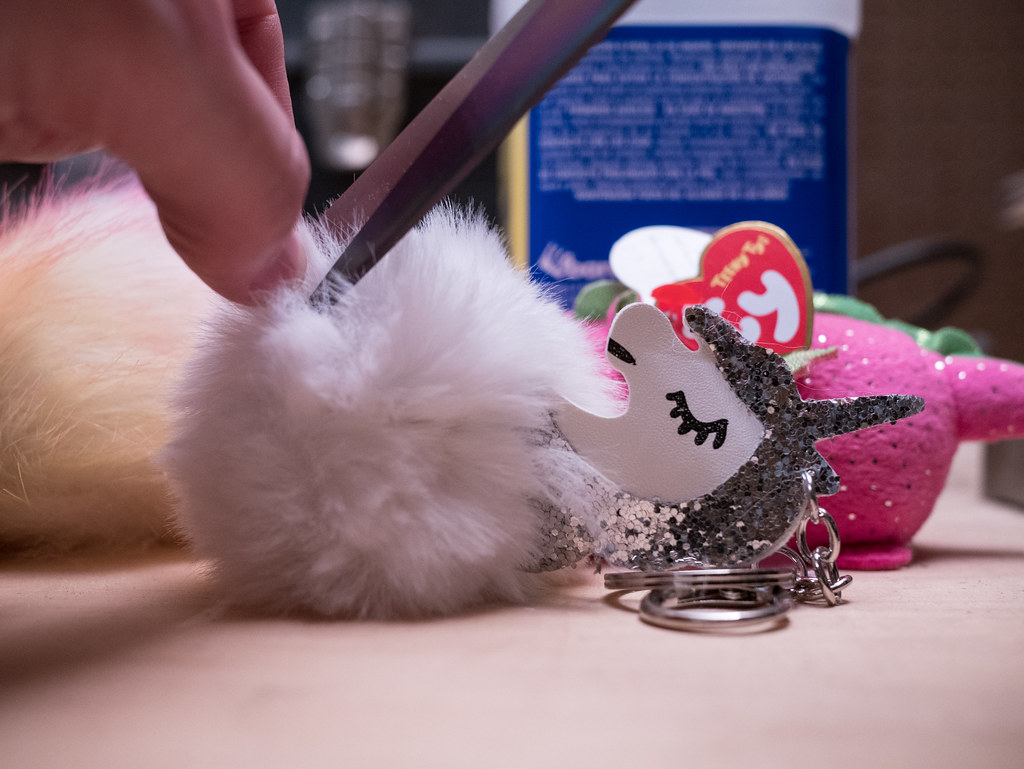
Magic wands must have magic cores. Garrick Ollivander has found there are 3 supreme cores - unicorn hair, dragon heartsting, and phoenix feather. To provide these cores, I bought cheap toys from aliexpress for a couple bucks each. They took a month or two to come in, but they worked perfectly for my uses.
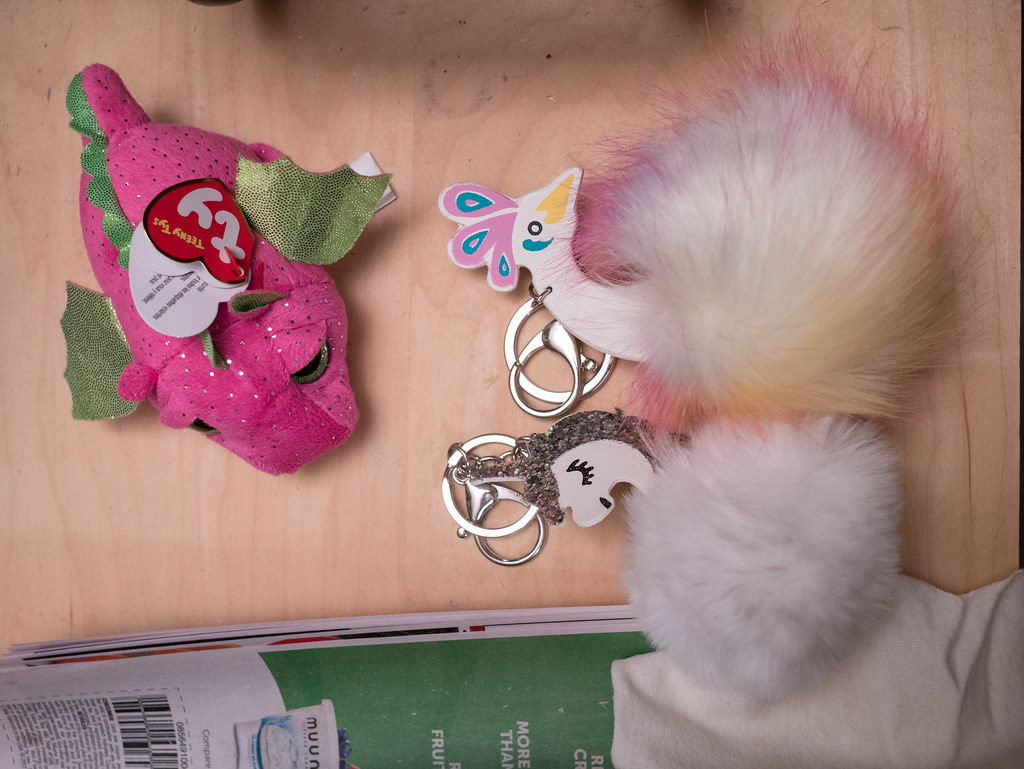
I cut off unicorn tail hair and phoenix tail feathers. I cut open the dragon to pull out its heartstrings (stuffing).
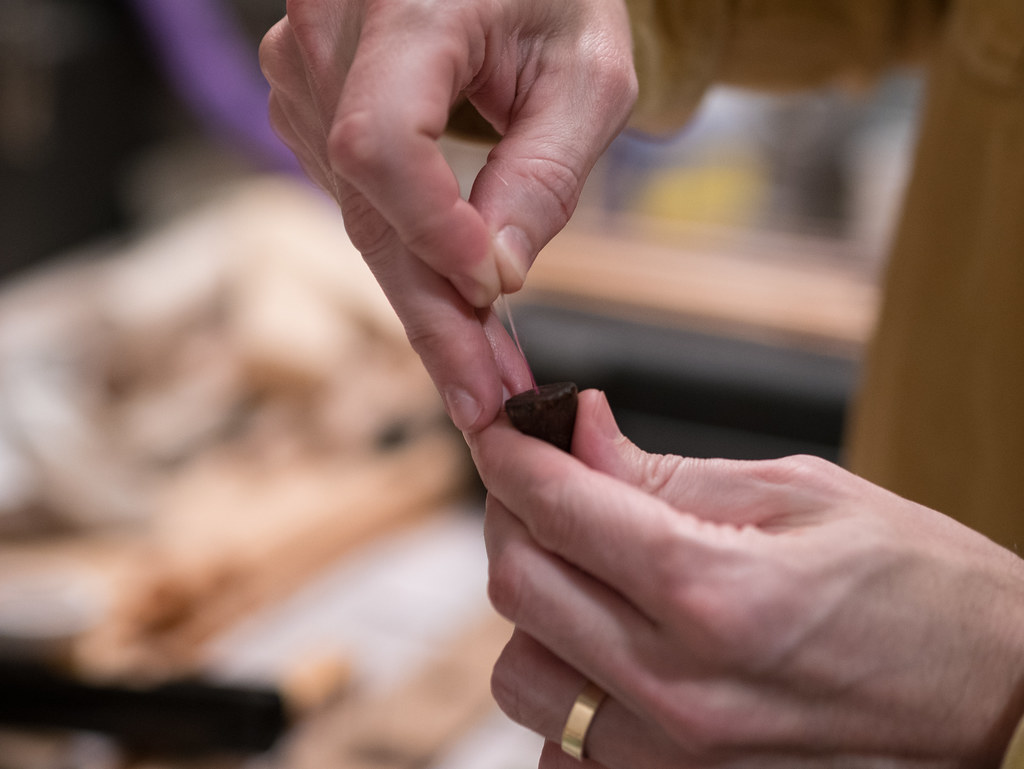
I drilled tiny holes in the bottom of all the wands to insert the cores. I actually drilled those holes before staining, as they provided a good way to stand up the wands to stain/seal them. After that was done, I inserted the cores into the wands (this is a phoenix feather) by hand and then used a wire nail with the point cut off (to make it flat) to push the core further in. After that, I filled the hole with wood putty.
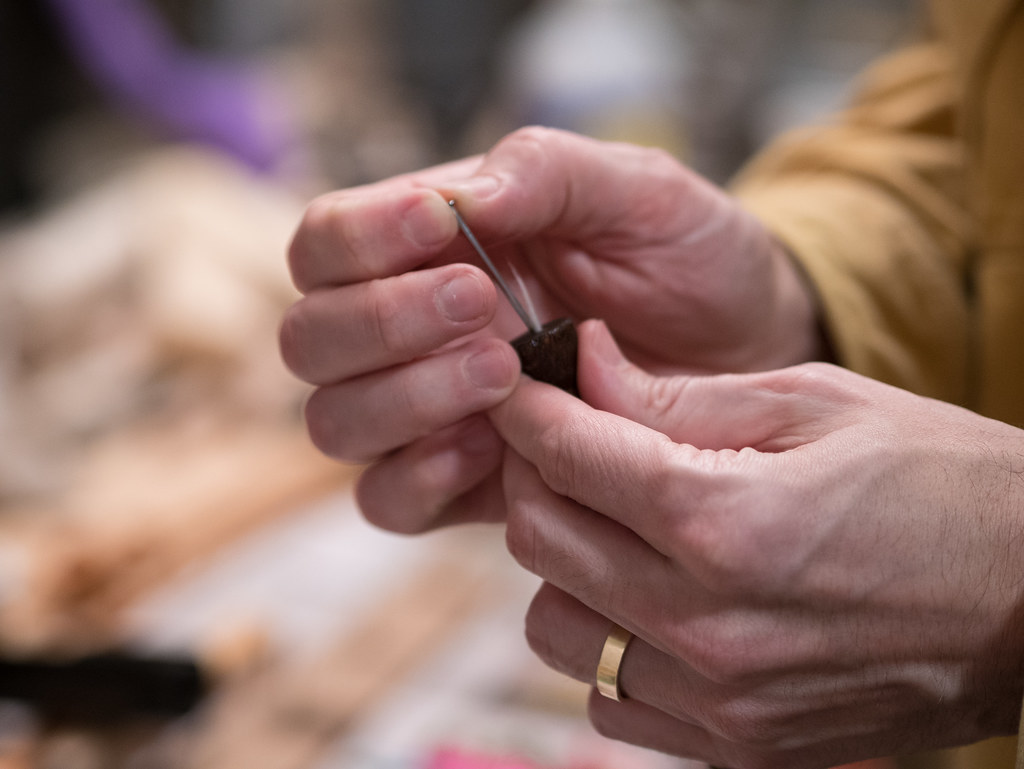
After the wood putty was dry, I stained and polyurethaned the bottom, completing the wand.
Finished wands
Here are all the wands I made. From left to right, that’s:
- Maple with dragon heartstring core
- Maple with phoenix feather core
- Pine with dragon heartstring core
- Cedar with unicorn hair core
- Cedar with dragon heartstring core
- Poplar with dragon heartstring core
- Pine with phoenix feather core
- Oak with unicorn hair core
- Poplar with dragon heartstring core
- Pine with hollow core (I stuck my remote in to run the show)
- Pine with unicorn hair core
- Oak with phoenix feather core
- Poplar with phoenix feather core
- Oak with dragon heartstring core
- Poplar with unicorn hair core
- Maple with unicorn hair core
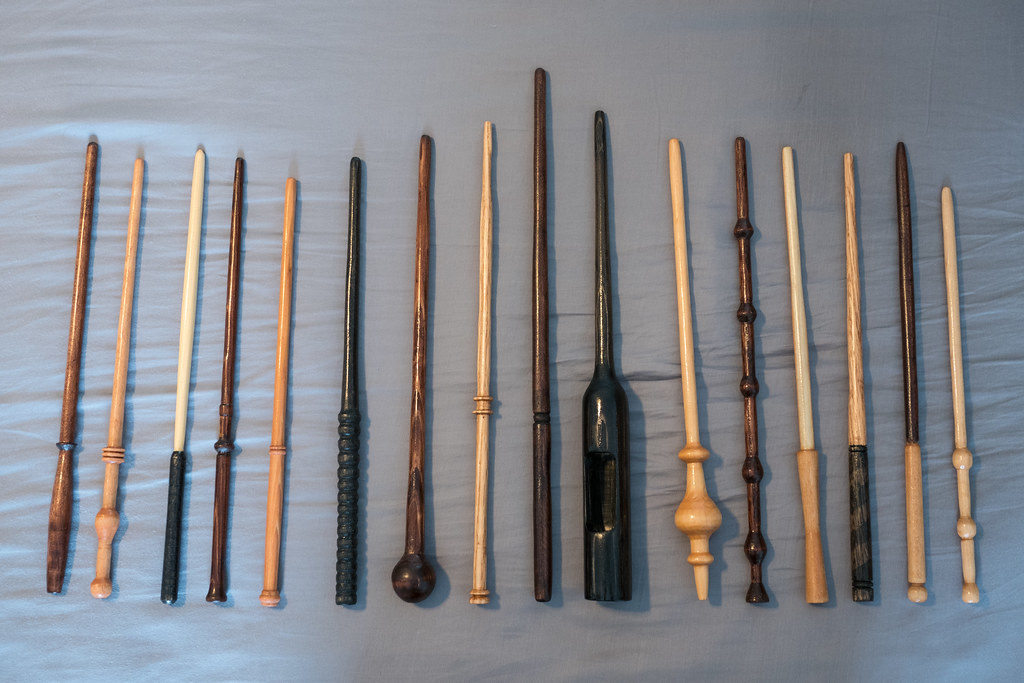
I was really pleased with how they turned out. Lots of interesting designs, and they feel great in the hand. (Molly ended up with #12, and Leah got #11). I look forward to making another batch in a couple years when Leah turns 11.
If you’ve got questions, please don’t hesitate to ask. And if you just want to tell me how ridiculous I am for doing this, I’m happy to hear that as well.

great working keep sharing with us.
I read about these wands on Lumberjocks and had to come and visit!
I’ve been asked to create 3 wands for some rambunctious lads and was wondering about the minimum diameter you used. The customer explained that it would be good to overbuild them a bit of they wouldn’t last an hour…
I didn’t know about the cores so you probably saved me some embarrassment on that part!
Mike
Mike – many of the wands taper. The thinner ones go from a diameter of 3/8″ at the top of the handle down to about 1/4″ at the tip. The handles get down to 3/8″ in the thinnest case, though most are a bit more than that.