Hogwarts Party Special Effects
Posted in Celebrations on April 5th, 2018 by c-had – Be the first to commentIn addition to my behind-the-scenes post about making wands, I thought I’d do a post on how I created the special effects in Molly’s party. This will be a technical post with details on what I did. Please feel free to ask questions if something isn’t clear.
Setup
Most of the show was run from QLab. It’s awesome show control software used for everything from Broadway to high school theater, concerts and the Olympics. It’s also the software that I help create in my day job. So, much of the show was run from QLab running on my MacBook Pro. This allowed me to control video, audio, and lights.
Audio/Video
For audio and video, my computer was connected to:
- My 5.1 surround sound receiver via a cheap USB-C->HDMI adapter. I already had surround sound speakers and a wall-mounted TV, which QLab could access via this connection. QLab allowed mixing audio amongst the speakers, so I could locate sounds wherever I liked.
- An old Dell Monitor in vertical orientation via a cheap USB-C->VGA adapter. This gave me another screen to use for a moving portrait.
- Our Yamaha P-115 Digital Piano via MIDI over a USB cable. This meant I could play music via MIDI on the piano.
Lighting
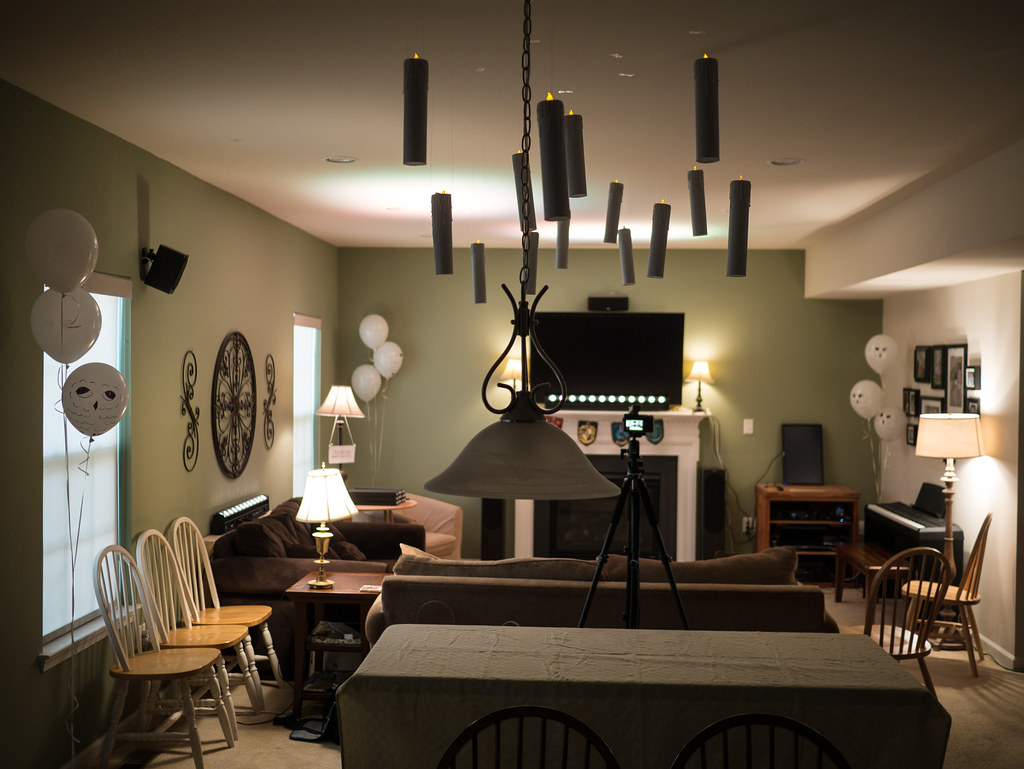
For lighting, I put down the shades and turned off all the house lights to give myself the most control I could. For lights I used:
- 5 Lamps. I then gathered all the lamps I could find in the house, replaced their LED bulbs with incandescent or halogen, and plugged them into a couple of Leviton D4DMX-MD5 dimmer packs I borrowed from work.
- 2 Chauvet COLORband PiX-M light bars I borrowed from work.
- 1 old desktop oscillating fan. While not a light, I plugged it into one of the dimmers as well so I could trigger it too.
These were plugged into two Art-Net adapters (a DMXKing eDMX1 Pro and a DMXKing ultraDMX2 Pro) I borrowed from work. One was placed on each side of the room (to reduce cable runs). On one side, I already had Ethernet for it to plug into. On the other side, I used a couple of old Wifi routers in bridge mode (one upstairs, one under a table where I needed it) to give me an Ethernet port to plug my Art-Net adapter into. QLab on my computer sent out Art-Net over Wifi to these adapters which convert it to DMX to send to the lights/dimmers.
Remote Control
I hid my computer with the screen off for the party, so I needed ways to remotely control it. This was accomplished with two things:
- QLab Remote on my phone. I used this to pick effects to trigger. When I was in the background, I would also trigger cues from my phone. But, when I was up front, I didn’t want to make it obvious that I was using a phone to trigger things. This led me to my other remote.
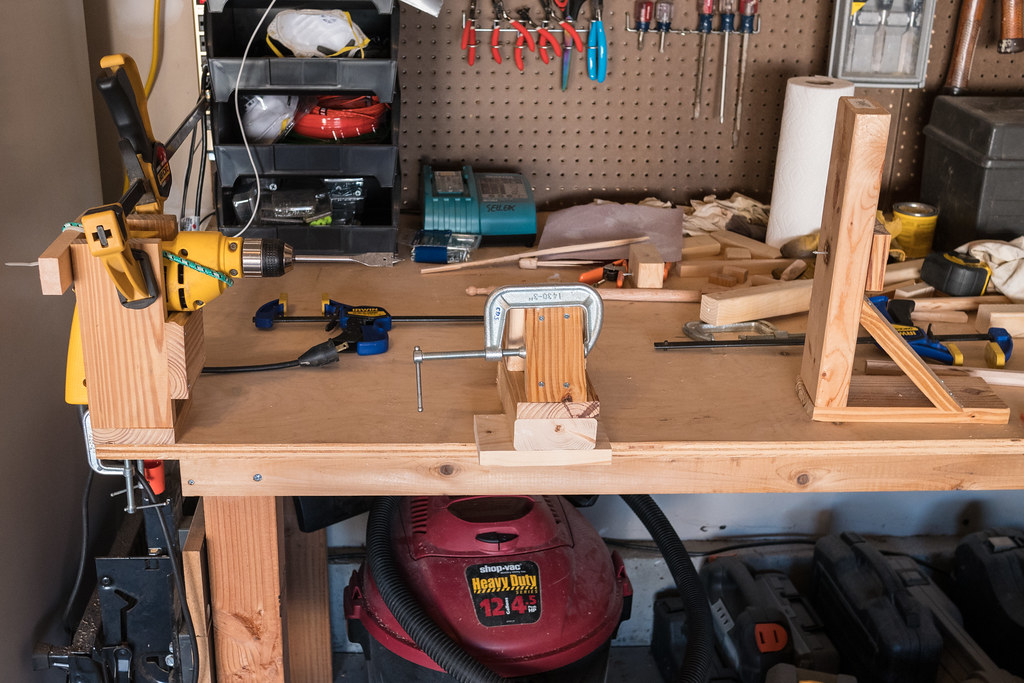
- Wand remote. As I was making my own wands, I decided I could make a wand for myself with a remote inside it. I already had a cheap wireless PowerPoint remote, so I made myself a wand with an extra large handle that could contain the remote. I cut a hole in the side of the wand so I could access the buttons and inserted the remote into the wand. Then I changed the keymap in QLab up to Go off the remote instead of space bar. I set my phone off to the side (e.g. on the wand table) and picked an effect on it, then fired the effect in character from my wand during the action.

Effects
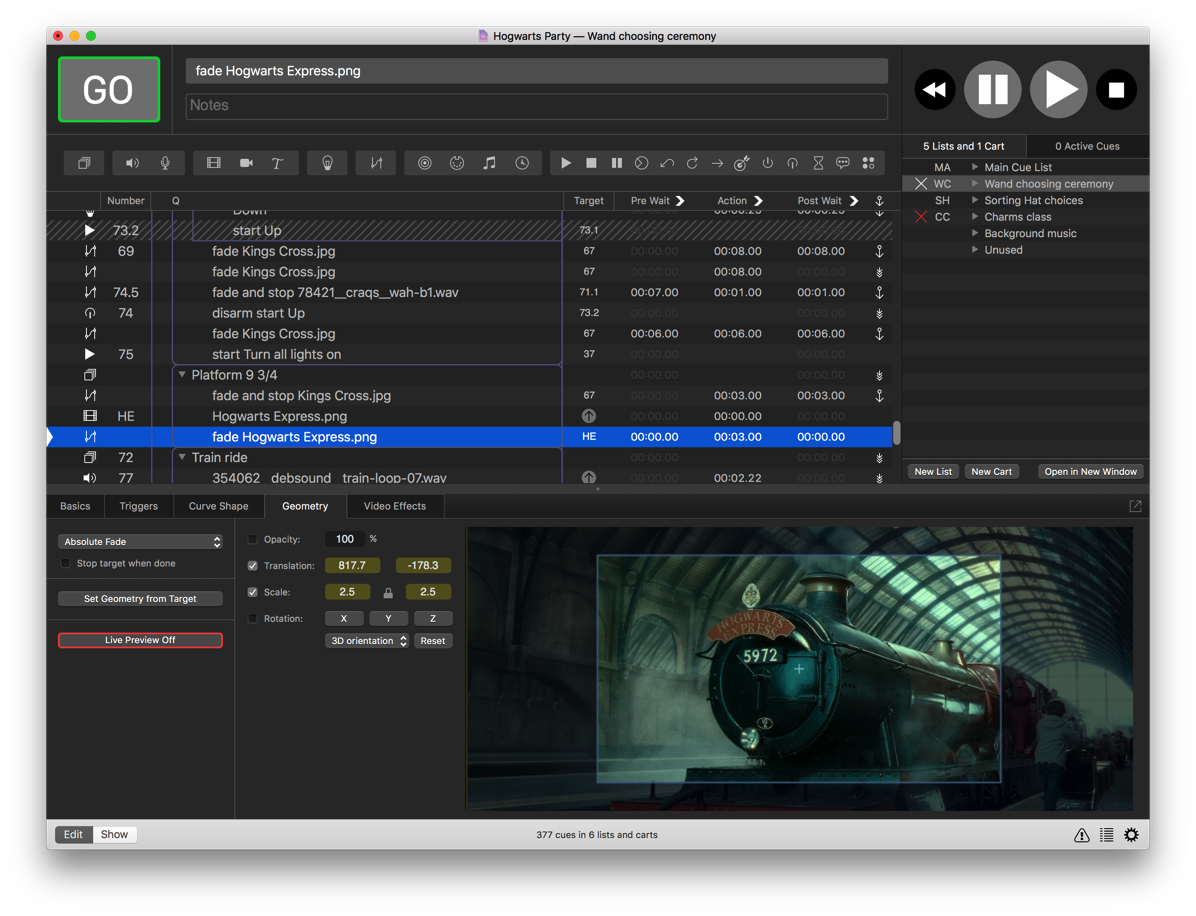
I created the effects with a mix of media I found and media I created. I programmed almost all of them in QLab. You can download my QLab workspace if you’re interested (made with QLab 4.2). It includes much of the media, but does not include anything too large (e.g. most videos) or anything that wasn’t freely available. If you’re putting on a party and are interested in the stuff that was too large to post, get in touch and I’ll send it to you.
Individual effects
Here’s a list of most of the effects used. The title for most is a link to a YouTube video of that effect if you want to see it in action. Most are also named the same as you’ll find them in the QLab workspace.
- Moving portraits - videos shot by me on my Panasonic GX85 with a Zoom H1 microphone, edited in Final Cut Pro. Acted by Jen and me. Not included in download due to size.
- Falling books - audio downloaded from freesound.org. I reversed this in Audacity to create the repair effect. Located in the speaker back right of the girls.
- TV/frame breaking - found an image in google search for the broken glass, audio downloaded from freesound.org. I reversed this in Audacity to create the repair effect. I used a mask image in QLab to have the cracks expand/contract.
- Fire alarm - audio downloaded from freesound.org. Lights were a chase preset, red color, and kept moving the tilt of the bars up and down. More details in the QLab workspace.
- Dishes breaking - audio downloaded from freesound.org. I reversed this in Audacity to create the repair effect. Located in the speaker back left of the girls.
- Piano noise - Done entirely with MIDI cues. QLab isn’t really geared toward this, so I had to create separate cues for each note, and use post waits to space those notes out.
- Loud music - audio downloaded from freesound.org. As basic as it gets.
- Power outage - simply turned the lights off.
- Power fluctuation - Used a bunch of light cues to create my own chase of light flying around the room. Played a 50Hz buzz (also from freesound.org) which also moved around the room along with the lights. Ended up being a pretty cool effect.
- Wand success - When the wand found its witch, a success effect included:
- Angelic voices audio (also from freesound.org)
- Warm yellowish light - all the lamps turned off, the color bars till toward the witch, and turn on with a warm yellowish light
- Wind. In the movie, Harry’s hair starts blowing back when he finds his wand. So I put a fan under the table angled up at the wand seeker, and turned on the fan in this effect.
- Portkey - The Portkey effect included funky lights cycling through colors and funky music (from freesound.org). On the screen, I showed a picture of the real King’s Cross Station (from an image search) with the Kaleidoscope video effect. As we traveled, I scaled back the effect until it eventually went away, revealing our destination on the screen.
- Platform Nine and Three Quarters - The image of the Hogwarts Express was a screen grab from the final scene of the last movie. The train audio was from freesound.org. The video of Hogwarts Castle was from Youtube, and had a simple fade on the video geometry. The arrival music was from the soundtrack to Sorcerer’s Stone.
- Sorting hat - The Sorting hat audio was all recorded by me using a funny voice. The song is actually from the first book (with tune made up on the spot by me). The things it says for each student were all made up by me. And all that audio is in the workspace you can download.
- Locomotor piano - This is basically the same idea as Piano noise above. Lots of MIDI cues, but this time they had to be right to play Hedwig’s Theme. I used Leah’s piano sheet music of the song to find the notes, then programmed them each in one by one.
- Accio - Things to be summoned were on the screen. I found an image of a pencil and a mug on an image search, then used Photoshop to make their backgrounds transparent. For the chickens, I found a video of them on a green screen, then put them on a transparent background in Final Cut Pro and exported as ProRes 4444. In QLab, I just looped the chickens and used geometry fades to summon them and send them away.
- Stupefy - Stupefy used the same videos shot for the Moving portraits above. The spell light was an image I made in Photoshop using a custom brush from sparklestock.com. I animated revealing the light in Final Cut Pro.
- Meteolojinx Recanto - For this effect, I turned on the lamps and looped some rain. Whenever I wanted to, I triggered thunder which included sound and flickering the lights timed together. On spell success, I simply stopped all the sounds.
The show
Thankfully, everything worked very well in the party. QLab Remote worked great to standby a cue, and the wand worked great to trigger them. It was really fun to be able to perform magic with a wand. Most of the girls never figured out how I was making triggering effects. It seemed I could stand in the middle of a room and wave my wand, and things would just happen.


